How to make a platformer without coding: complete guide
Platformers are the perfect first game. Here's how to build one that actually feels good to play — no programming required.
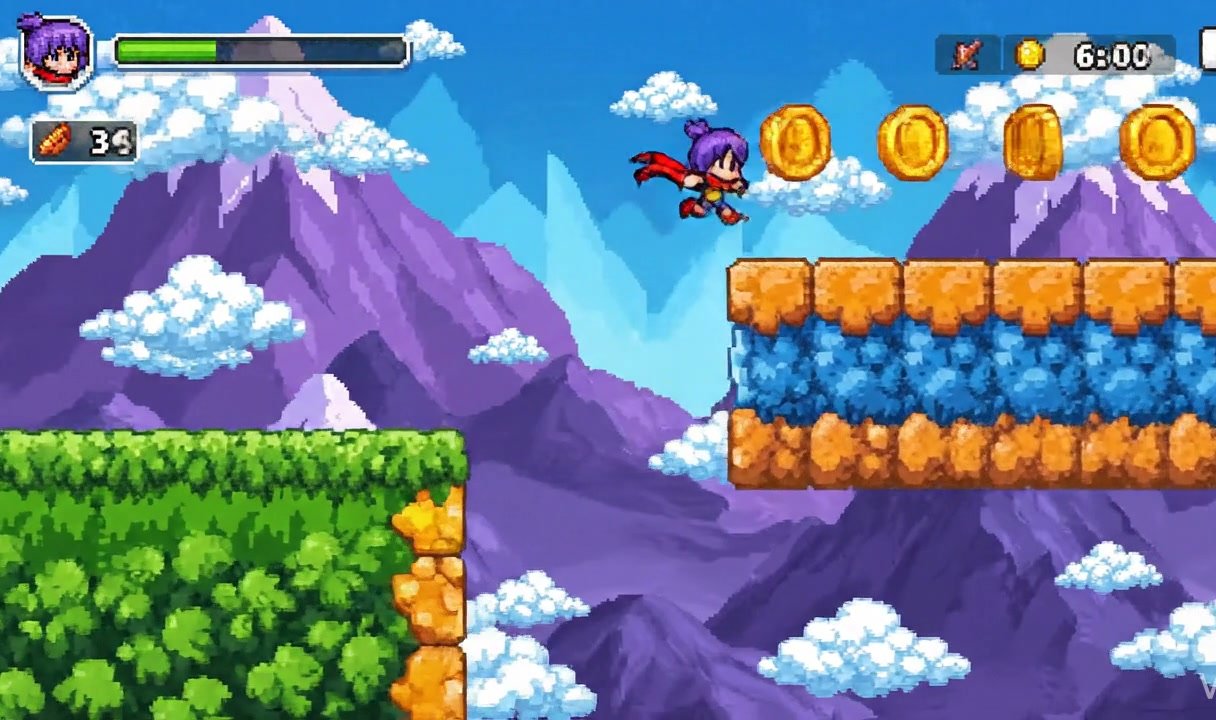
There's a reason almost every game developer starts with a platformer.
The genre is deceptively simple. A character, some platforms, a jump button. You can sketch the core loop on a napkin. But the gap between "character moves left and right" and "this actually feels good" is enormous — and that gap is where most first projects die.
This guide is about crossing that gap. We'll break down exactly what makes a platformer feel great, how to design levels that teach without tutorials, and how to add the kind of polish that separates "my first game" from "I can't stop playing this." No programming required.
Why platformers are the perfect first game
Platformers force you to care about the things that actually matter in game design. Not narrative. Not scope. Not a hundred interconnected systems. Just a character, a world, and the question: does this feel good to control?
That constraint is a gift. You can't hide behind content. If your movement feels bad, the whole game feels bad. If your jump is off by even a little, players will know within seconds — even if they can't articulate why.
Platformers also have an incredibly tight feedback loop. You make a change to the jump height, you playtest it immediately. You add a particle effect to the landing, you see the difference in real time. There's no waiting for a 40-hour campaign to reveal whether your design decisions worked.
And the scope is manageable. A complete, polished platformer with 10-15 levels is a real game. It's something you can finish, share, and be proud of. That matters more than most people realize — finishing a game teaches you things that starting twenty games never will.
The mechanics that make or break your platformer
Here's where most guides go wrong. They tell you to "add a jump" and move on. But a jump is not one thing. It's a constellation of interconnected behaviors, and getting them right is the difference between a game that feels professional and one that feels like a homework assignment.
Movement: acceleration and deceleration
Your character should not move at a fixed speed the instant the player presses a direction. That feels robotic. Instead, there should be a tiny ramp-up — maybe 3-5 frames to reach full speed — that gives the brain a sense of momentum.
Deceleration matters even more. When the player releases the movement key, the character should slide a tiny bit before stopping. Not ice-physics levels of sliding — just enough to feel like a physical object with mass. Two to four frames of deceleration is the sweet spot for most platformers.
The critical thing is that these values feel different depending on your game's identity. Celeste has very snappy, almost instant acceleration because it's a precision game. Super Mario Bros. has much longer acceleration curves because it's about momentum and flow. Neither is wrong. Both are deliberate.
If you're building your first platformer, start snappy. It's easier to add momentum later than to fight floaty controls.
Jumping: the heart of the whole genre
A platformer lives or dies by its jump. Here are the three systems you absolutely must get right.
Variable jump height. When the player holds the jump button, the character should jump higher than when they tap it. This is non-negotiable. It gives players precise control over their arc without them having to think about it consciously. Technically, this means cutting upward velocity when the button is released early. The shape of that deceleration curve matters — too sharp and short hops feel clipped, too gradual and they don't feel distinct from full jumps.
Coyote time. If the player walks off the edge of a platform and presses jump a few frames later, the game should still let them jump. This is named after Wile E. Coyote hovering in the air before falling, and it exists in every great platformer ever made. A window of 4-6 frames is standard. Players never notice coyote time when it's present. They absolutely notice when it's missing — the game will feel unfair and broken, and players will swear they pressed the button in time.
Input buffering. If the player presses the jump button a few frames before they land, the game should queue that input and execute the jump the instant they touch the ground. Without this, fast sequences of jumps feel unresponsive. Players will mash the button harder, convinced the controls are broken. A 4-6 frame buffer window is typical.
These three systems are invisible to the player. They will never thank you for implementing them. But without them, your platformer will feel like it's fighting the player at every step.

Collision: the boring part that ruins everything
Collision detection isn't glamorous, but sloppy collision will destroy your game faster than anything else.
The two most common problems in amateur platformers: the character gets stuck on the seam between two tiles, and the character catches on the edge of platforms when trying to land. Both feel terrible. Both make players quit.
Corner correction is the fix. When the character's head hits the corner of a block during a jump, the game nudges them a few pixels to the side so the jump continues instead of bonking. When the character barely misses the edge of a platform, the game pulls them up onto it. Mega Man does this. Mario does this. Celeste does this aggressively. It makes the game feel generous without the player ever realizing what happened.
If your tool or engine doesn't handle corner correction automatically, this is worth solving before you do anything else. A platformer with perfect jump feel and bad collision will still feel bad.
Level design: teaching without tutorials
Good platformer levels are silent teachers. The player should learn every mechanic by doing it, not by reading about it.
Introduce one thing at a time
The first time you introduce a new mechanic — a moving platform, a wall jump, a bounce pad — present it in a safe environment. No enemies. No pits. No time pressure. Let the player experiment, fail, and understand the mechanic before you ask them to use it under stress.
Then combine it with something they already know. A moving platform over a pit. A wall jump to reach a high ledge with enemies on it. Each level should feel like a conversation: "Here's a new idea. Got it? Good. Now try it with this."
Shigeru Miyamoto called this "kishōtenketsu" — introduce, develop, twist, conclude. World 1-1 of Super Mario Bros. is still the best example. The first Goomba teaches you about enemies. The first ? block teaches you about power-ups. The first pit teaches you about jumping precision. None of this is explained with text. It's all communicated through the level itself.
The difficulty curve
Difficulty should ramp up, but not linearly. The best platformers follow a sawtooth pattern — tension builds over several sections, then releases with a calmer area or a reward, then builds again. This gives players room to breathe and makes the hard parts feel earned rather than exhausting.
A common mistake is making each level harder than the last without any rest. This burns players out. Another common mistake is putting your hardest challenge at the end of a long level with no checkpoints. That's not difficulty — that's disrespect for the player's time.
Visual language
The player should be able to read your level at a glance. Dangerous things should look dangerous. Safe things should look safe. Platforms you can land on should be visually distinct from background elements you'll pass through.
This sounds obvious, but it's one of the most common failures in first-time platformers. When the player can't tell what's a platform and what's decoration, every death feels unfair — not because the challenge was hard, but because the information was unclear. Clarity is kindness.
The polish that separates amateur from addictive
You've got your mechanics working and your levels built. The game is functional. Now it's time to make it feel alive.
Squash and stretch
When your character jumps, stretch them vertically. When they land, squash them horizontally. When they change direction quickly, squish them in the direction of movement. This is the oldest animation principle in the book, and it works because it communicates force.
The effect should be subtle — maybe 10-20% distortion at most. Too much and your character looks like they're made of jelly. Just enough and they feel physical, responsive, alive.
Particles
Dust puffs when the character lands. Small clouds when they dash. Tiny debris when a block breaks. Particles are cheap to add and disproportionately impactful. They fill the gap between "the character did a thing" and "the character did a thing and the world reacted."
Don't overdo it. A few well-placed particle effects are better than particles on everything. The goal is punctuation, not noise.

Camera work
A static camera that follows the player 1:1 is functional but lifeless. A few adjustments make an enormous difference:
Look-ahead. Shift the camera slightly in the direction the player is moving so they can see what's coming. This is subtle — maybe 20-30 pixels — but it makes the game feel spacious and fair.
Landing dip. When the player lands from a big fall, the camera should dip slightly downward and then recover. This sells the weight of the impact and makes landings feel satisfying.
Smoothing. The camera should ease toward its target position rather than snapping to it. A simple lerp (linear interpolation) with a factor of 0.1-0.2 per frame gives the camera a fluid, cinematic quality without ever feeling laggy.
Sound design
Sound is the most underrated element in platformer design. A crunchy jump sound makes jumping feel better. A satisfying thwack on enemy hits makes combat feel impactful. A subtle pitch variation on repeated sounds (coins, footsteps) keeps them from sounding robotic.
You don't need a sound studio. Free sound libraries like Freesound.org and tools like sfxr/jsfxr can generate retro-style sound effects in minutes. The key is making sure every player action has an audio response. Silence after a button press feels like the game isn't listening.
Tools for building a platformer without code
The landscape of no-code game tools has expanded dramatically, but they're not all equal — especially for platformers, where feel matters more than in almost any other genre.
Visual/node-based engines like GDevelop and Construct give you direct control over physics values, collision, and animation. They're powerful, but there's still a significant learning curve, and you'll spend a lot of time tweaking numbers to get the feel right.
AI-powered tools are the newer option. They let you describe what you want in plain language and generate playable results. The tradeoff is that most AI tools generate code that works mechanically but lacks the invisible polish details we've been discussing — no coyote time, no input buffering, no squash and stretch, no landing particles.
The exception is when the AI tool is specifically designed around game feel. Exekite, for instance, bakes in platformer-specific polish — coyote time, input buffering, variable jump height, camera smoothing, particle effects — by default, because the system was built by people who understand that these details aren't optional. They're the difference between a game that works and a game that feels good.
Whatever tool you choose, prioritize one that lets you playtest instantly and iterate fast. Platformer feel is discovered through repetition, not planning.
A step-by-step approach to your first platformer
Don't try to build the whole game at once. Here's an order that works:
1. Get the character moving. Just left, right, and jump on flat ground. Spend real time here. Tweak the acceleration, the jump height, the gravity. Playtest obsessively. Don't move on until running and jumping feels good — not functional, good.
2. Build a test level. Simple geometry. Platforms at different heights and distances. Gaps to jump over. No enemies, no hazards, no art. Just shapes. This is your playground for testing movement feel.
3. Add one hazard. Spikes, a pit, a single enemy with simple behavior. This forces you to think about what happens when the player fails. Respawning, checkpoints, death animation. Keep it simple.
4. Design three real levels. Use the principles above — introduce, develop, twist, conclude. Make the first level forgiving. Make the third level challenging. Make the second level the bridge between them.
5. Add polish. Squash/stretch, particles, camera effects, sound. This is where your game transforms from a prototype into something people actually want to play.
6. Playtest with someone who isn't you. Watch them play. Don't explain anything. Every time they get confused, stuck, or frustrated — that's data. Fix those spots. Then playtest again.
This process works whether you're using a visual engine, writing code, or describing your game to an AI tool. The order matters because each step builds on the last, and skipping ahead — especially skipping step 1 — always costs you more time later.
The real secret
The best platformers aren't the ones with the most levels, the most mechanics, or the most impressive art. They're the ones where running and jumping feels so good that you'd do it in an empty room.
Start there. Get the feel right. Everything else is easier when the foundation is solid.
And if you want that foundation built in with the polish already baked in — Exekite was designed for exactly that.